Accessibility
Home / DevNet / Dreamweaver Development Center /
DevNet
Dreamweaver Article

Appendix A: Site Setup and Database Connection
Before you can actually try this sample website for yourself, you must create a site in Dreamweaver MX and set up a few things.

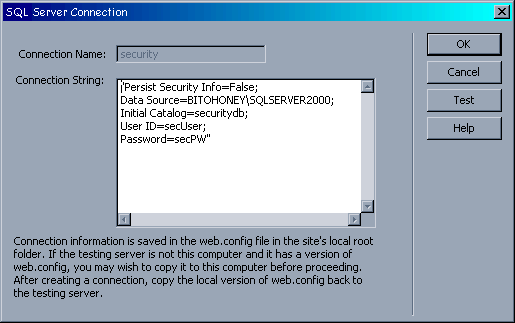
Setting up the testing server.  Bring up the Site Definition dialog box by choosing Site > Edit Sites, selecting your site's name from the list, and clicking the Edit button:

Edit Sites dialog box
 

Set up the testing server to use ASP.NET C# as the Server Model. Set the Access and other values as appropriate for your site, as shown:

Site Definition dialog box
 

For more information about site setup, refer to the Dreamweaver MX documentation.

Specifying your database.  Open the Application panel group, click the Databases tab, click the plus button, and select the SQL Server Connection option:

Set up a SQL Server Connection using the Database tab in the Application panel
 

The SQL Server Connection dialog box appears:

SQL Server Connection dialog box
 

When this dialog box appears, type the appropriate information. Ensure that it matches your database (such as the User ID, Password, and database name).

Take a look at web.config in your site's root directory. Notice that Dreamweaver MX added several new lines under the <appSettings> tag:

<appSettings>
   <add key="MM_CONNECTION_HANDLER_security" value="sqlserver.htm" />
   <add key="MM_CONNECTION_STRING_security" value="Persist Security Info=True;
      Data Source=BITOHONEY\SQLSERVER2000;Initial Catalog=security;
      User ID=secUser;Password=secPwd" /> 
   <add key="MM_CONNECTION_DATABASETYPE_security" value="SQLServer" />
   <add key="MM_CONNECTION_SCHEMA_security" value="" />
   <add key="MM_CONNECTION_CATALOG_security" value="" />
</appSettings>

You only have to do this once. From here on, Dreamweaver MX knows that this connection exists.


Previous Contents Next